
Rear Window Stickers for Trucks: The Complete Guide
If you’ve spent any time on the highway, you’ve probably noticed it: trucks covered in decals — family stick figures, hunting logos, punchy one-liners, company branding, thin blue line flags, and everything in between. Rear window stickers have become one of the most popular ways truck owners personalize their rides, show off their interests, or promote a business on the move.
This guide covers everything you need to know before slapping a decal on your back glass — from material choices to installation tips to design considerations that actually hold up in the real world.
Why Rear Window Stickers Are So Popular on Trucks
Trucks have more usable rear window real estate than most vehicles, and that large, flat surface is basically a blank canvas. Owners use it for a few common reasons:
- Personal expression — hobbies, sports teams, military branches, or family silhouettes
- Business advertising — a rolling billboard for local companies, contractors, and tradespeople
- Brand loyalty — off-road, hunting, fishing, or automotive aftermarket brands
- Humor and personality — funny slogans or pop-culture references
- Patriotic and tribute designs — flags, first responder support, or memorial decals
Because trucks are often work vehicles or daily drivers seen by hundreds of people a day, a well-designed rear window sticker gets more visibility than almost any other form of low-cost marketing or self-expression.
Choosing the Right Material
Not all vinyl is created equal, and the material you choose will affect how long your sticker lasts and how it looks once applied.
1. Cast Vinyl
The premium option. Cast vinyl conforms well to curved rear windows, resists fading, and typically lasts 5-7 years outdoors. It’s the go-to choice for detailed designs or anything expected to survive years of sun exposure.
2. Calendered Vinyl
A budget-friendly alternative that works fine for flatter surfaces and shorter-term use. It’s more prone to shrinking or cracking over time, especially in intense heat, but it’s a reasonable choice for simpler designs or temporary promotions.
3. Perforated Vinyl (One-Way Vision)
This is the material used for large decals that cover most of the rear window while still allowing the driver to see out. It’s popular for full-window business branding or bold graphic wraps, since it looks solid from the outside but appears as tiny dots from the inside.
Design Considerations Before You Order
A design that looks great on a screen doesn’t always translate well to a curved, sun-exposed truck window. Keep these points in mind:
- Contrast matters. White or light-colored vinyl tends to show up best against tinted rear glass.
- Simplify fine details. Small text or intricate line work can get lost from a distance or blur at highway speed.
- Mind the wiper and defroster lines. Factor in any rear wiper blade or defroster wires when placing your design so it doesn’t get cut or distorted.
- Consider size relative to the vehicle. A decal that looks bold on a laptop screen might look oversized — or too small — once it’s actually on the truck.
- Think about long-term fading. Bright colors like red and orange tend to fade faster than black or white in direct sun.
Installation Tips
Getting a clean, bubble-free application makes a big difference in how professional the final result looks.
- Clean the window thoroughly — any dust, wax residue, or grease will show up as bumps under the vinyl.
- Use the wet application method for larger decals — a light mist of soapy water lets you reposition the sticker before it sets.
- Use a squeegee, not your hands — working from the center outward pushes out air bubbles and water evenly.
- Avoid installing in direct sun or extreme cold — vinyl adhesive performs best in moderate temperatures, generally 50-90°F.
- Let it cure before running the defroster or washing the truck — give it at least 24-48 hours to fully bond.
From Decals to Full Custom Branding
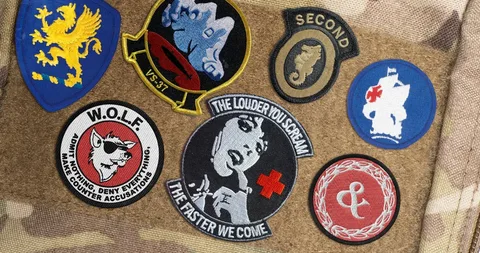
Rear window stickers are often just one part of a bigger personalization or branding project. Truck owners who start with a window decal frequently move on to other customization — embroidered patches for work jackets, hats, or uniforms being one of the most common next steps, especially for businesses building out a consistent brand across vehicles and apparel.
If you’re exploring that route, it helps to start with a solid layout before committing to production. Using a Free Patch Design Template is a simple way to mock up a logo or design before turning it into an embroidered patch, so you can see proportions, colors, and text placement the same way you would with a window decal proof.
For businesses that want branding consistency between their trucks, uniforms, and merchandise, working with a dedicated patches maker makes it easier to keep logos, colors, and design elements uniform across every surface — from the rear window all the way down to the stitched patch on a work jacket.
Final Thoughts
Rear window stickers are one of the most cost-effective ways to personalize a truck or promote a business on the road. Picking the right vinyl, planning your design with the window’s curves and moving parts in mind, and taking care during installation will get you a decal that looks sharp for years rather than months.
And if the window sticker is just the starting point for a bigger branding push, extending that same design into patches, uniforms, or merch is a natural next step — one that’s a lot easier when you start with a clear, well-tested design template.